
Looking to learn how to make fishing lures?
When I was 9, I went on a fishing trip with my Dad and ever since then, I always asked myself “what’s the plastic tool my Dad likes to cast into the river?”
Can you guess it? It’s simply called a plastic lure. I know you are also curious to know about these lures and today, your curiosity has brought you to the right place! Because in this guide, I’ll explain the techniques, materials, and creative insights you need to make the best fishing lures to catch fish. So without further delay, let’s dive in.
Why Make Your Own Lures?
Even if you already own fishing lures, making lures of your own allows you to design them as you like, which can be really fun. There are also many other tangible reasons for making your own lures. Here are some of them:
- It helps you to have something the fishes are not familiar with
- It saves you the cost of having to buy lures, which can be costly
- It helps you to design the lures exactly how you want them
- It gives you a feeling of satisfaction and accomplishment
- It’s a thing of fun you can share with others
Tools and Materials for Lure Making
This depends on the type of lures you want to make. For example, when I made my first plastic lure, I used hand gloves, pliers, soft plastic, microwave, and a wire cutter. You may decide to make a different type of lure but in any case, here are the essential tools you may need for lure making:
- Pliers for bending hooks
- Wire cutters for cutting wires
- Craft knife for cutting balsa
- Scalpel for shaping wires
The essential materials are:
- Soft plastics, like rubber worms
- Metals, like lead or tungsten
- Paints for making your lures more durable
- Feathers to mimic the appearance of a prey
- Hooks for hooking fishes when they approach a lure
- Plastisol to make soft plastic lures
- Microwave for heating the plastisol
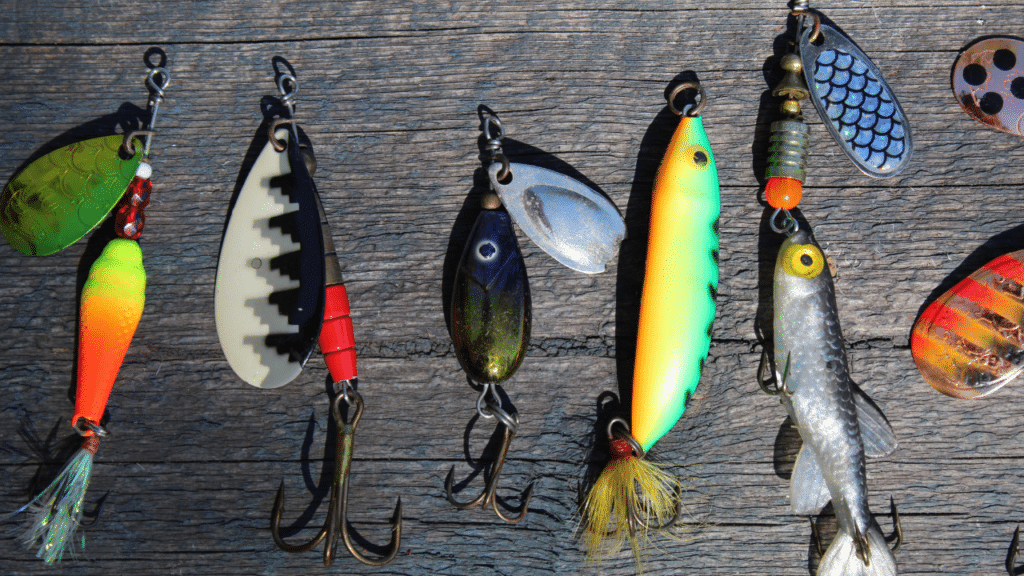
Types of Lures You Can Make
Lures are used to imitate bait fish so that fishes can be tricked to bite them instead of their actual food in the river. I’ve spent about 20 years fishing and I’ve come across different types of lures.
I can tell you how each one of them is made but the first thing you should know is to work on your knot-tying skills. Here are the 7 types of lures you can make. I didn’t include fly fishing lures because they require much more skill to make:
- Soft plastic lures
- Crankbaits
- Jerkbaits or stickbaits
- Spinners and Inline spinners
- Spinnerbaits
- Poppers
- Jigs and jig heads
Making Soft Plastic Lures
Soft plastic lures can be used in both fresh and saltwater. They are mostly used for smallmouth bass and bone fish, I tried it some years back and it worked well for me. Here are the detailed steps you need to make your soft plastic lures:
- Get necessary materials such as plastisol, paints, molds, stirring sticks, microwave, and softener
- Heat the plastisol in the microwave till it melts
- Stir the liquid with the stirring sticks
- Pour the liquid in a mold and wait till the plastic solidify
- Remove the soft plastic and paint it with your desired color
If you need a better illustration, kindly click on the link below to watch the procedure:
Making Crankbaits
Crankbaits are fishing lures that are made out of wood or plastic. When I went on a fishing trip in California, I used a crankbait to mimic a wounded fish and that same day, I was able to catch some large fish!
Here are the detailed steps you need to make a crankbait:
- Get materials such as wood, sandpaper, paint, and a coat
- Choose a suitable shape and carve the wood into your desired shape
- Paint the base with your desired color and seal the paint with clear coat to make it durable
- Attach hooks and split rings to the crankbait and test it in water before using it
If you need a visual explanation, kindly click on the link below and watch the making process:
Making Jerkbaits or Stickbaits
Jerkbaits or stickbaits are used to mimic baitfish of different sizes. They have a long and minnow-like shape. Decades ago, my Dad used the floating model of jerkbaits because that was what was available.
Today, there are advanced improvements and some models of jerkbaits now rise or sink very slowly at rest. Here are the detailed steps you need to make a jerkbait:
- You’ll need some wooden blocks, carving knives, paints, and hooks
- Use the carving knife to carve the wooden block to your exact choice
- Use a sandpaper to smoothen the curved lure
- Point the curved lure to achieve a realistic baitfish pattern
If you need to see the practical process here it is:
Making Spinners and Inline Spinners
I personally see this as a fun and rewarding project. It’s a thing of fun because you are investing your time in what you love doing! And it’s a rewarding project because the spinners are effective for catching trout, bass, and other species. Here are the detailed steps you need to make spinners and Inline spinners:
- Get your spinner blades, steel wires, hooks, split rings, wire cutters, and pliers
- Bend your steel wires into your desired shape using pliers
- Use split rings to attach hooks to your steel wires
- Add beads to the end of the steel wires so that fishes can be tricked
- Allow the spinner to rotate freely by attaching a swivel to the end of the steel wire.
- Paint the spinner with your desired color and allow it to dry
If you want a demonstrated explanation, check this out:
Making Spinnerbaits
If you are interested in bass fishing, you should consider the spinnerbait as one of your fishing lures because it’ll definitely work for you. How do I know? Well, China is the world’s most successful fishing country because the majority of their fishermen use spinnerbaits as lures. Here are the detailed steps you need to make a spinnerbait:
- You need to get a split ring, large blade, jig mold, skirt, wireform, beads and swivel
- Preheat your mold using your lead melting equipment
- Attach a hook to the wireform and place it in the mold cavity
- Attach the ring on the open end of your swivel
- Attach a large blade to the ring
- Attach your lure skirt over the hook and go for your fishing trip
If you want to watch the making process, here it is:
Making Your Own Surface Lures or Poppers
Surface lures or poppers are usually used as lures for smallmouth bass, largemouth bass, trout, and perch. I found out that these fishing lures are the secrets behind the fishing success of Indonesia. For you to make your own topwater lures, here are the necessary steps:
- Get some woods, epoxy glue, paint, and tremble hooks
- Sketch your lure design on the wood
- Use a craft knife to cut the basic shape of the lure
- Mark and drill holes for attaching hooks on the wood
- Use pliers to attach split rings to the holes
- Use a sandpaper to smoothen the surface of the lure
- Paint the surface lure and use a suitable coat to protect the paint
If you want to see the practical process to make this topwater lure, check this out:
Making Jigs and Jig Heads
5 years ago, all I had with me was $50 and I wanted to use Jig heads for my fishing trip in Boston. What do you think I did? I didn’t buy one, I made one! And it saved me a lot because I was able to spend my $50 on some other stuff. If you also want to cut costs today, follow these detailed steps to make your jigs and jig heads:
- Plan a suitable design
- Choose either lead or tungsten for the jig heads
- Melt the lead or tungsten and pour it into a mold
- Leave it for 10 minutes so that it can solidify
- Paint the jig heads with a suitable color and pattern that attract a fish
- Use wire to attach a hook to the jig head
If you want these steps demonstrated, kindly click on the link below:
Lure Making Process
The lure making process is an art of creating fishing baits that imitates the appearance of a prey. The essential materials for this process are wood,plastic, or metal as earlier discussed.
To make the fishing process easier for you, you’ll need to attach treble hooks to your lures so that you’ll find it easy to catch any fish that bite the fishing lures.
It’s important to note that today, most plugs and crankbaits are made of hard plastic but the first ones were made out of wood and they all perform the same functions.
Therefore, instead of buying expensive lures, I’ll advise you to save money by carving your own. Successful lure making requires a combination of both art and science to deceive fishes and that has been the popular goal of most anglers.
Optional Steps in Lure Making
I believe we all know that there are always optional steps to every process in this world. Lure making is also a process with optional steps and the word “optional” means it’s not compulsory.
So if you feel like you are already a professional at lure making, you probably don’t need these steps but if you feel like learning more tactics and ideas about lure making, this is probably for you.
The optional steps in lure making are:
- You need to make it life-like!
- Add some fish favorite food as lure
- Make it a waterproof lure
Make It Life-like!
This is what really captures the attention of the fishes you want to catch. If your lure doesn’t have eyes, what do you think it’ll do? It’ll most likely scare the fishes away.
So you have to drill two small holes in the front part of the lure and put two artificial eyes in there, make sure you gum it with a super glue. I’ll advise you to also create a fish-like nose for the lure so that when fishes see it, they’ll be easily tricked.
That’s what I did 4 years back, when I was on a fishing trip in China and trust me, I got back home jubilating.
What Do Fish Like to Eat? Hmmmm…
This is an important question and when you ask yourself this question, you’ll think about things like frogs, earthworms, insects, and many more.
Let’s take a frog for example, you can cut the fishing lure in the shape of a frog and then paint it with a green color but don’t forget to include the two bulging eyes.
Put it in the river and you’ll be surprised with the amount of fishes that’ll bite the lure, many have tried it and it worked for them so don’t be afraid to also give it a try!
Waterproofing
For this to be a success, you need to choose water resistant materials like hard plastics or resins. Now make sure your lure design has limited holes so that water won’t seep into the lure.
The next step is for you to apply a waterproof sealant like polyurethane or lacquer, this forms a protective barrier around your fishing lure. You can now paint the lure with waterproof paint and you’ll see how fantastic it’ll be.
Now for the Pointy Bits…
Add an eyelet to the back end, and one on the belly, near the middle, but closer to the front.
Attach a split ring between a treble hook and the eyelet on the rear and on the belly.
Lure Making Conclusions
In this guide, we’ve been able to go through the detailed steps required for you to make your desired fishing lures. It’s time for you to put these skills into practice so that you won’t forget them easily. My advice is that you stop spending your savings on the things you can do yourself, and spend it on better fishing gear instead. Get out and make some lures, I promise you that you’ll really love it. Start fishing with your lures and you’ll make more profits than ever before. I’ve opened the gate for you but it’s your turn to enter into the world of productivity. Happy fishing!